If you run a WordPress site using a site such as GoDaddy, 123reg etc then you really need to move off this shared hosting platform and transfer your site to your own personal vm in the cloud. You can set this up for as little as £10 a month for the A0 setup but I would recommend the A1 price tear for roughly £20 a month.
If you have a MSDN subscription you can also use the credits for the charges. It is a good time to grab a VM or two and setup your own servers, where you can host your own blog and showcase your awesome open source projects. VMs are your own mini server, where you get full remote desktop access and do whatever you like. You don’t have to be limited to a web based control panel. It’s your own baby server on the cloud, fully scalable and redundant.
Creating your VM
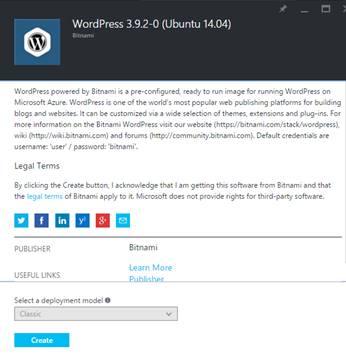
Search for Bitnami images in the azure dashboard and click the create button. It is that simple to setup a LAMP environment VM with WordPress pre installed on apache with MySQL as the database. Bitnami images also have phpmyadmin pre-installed to allow you to manage your database.
Once the VM is created, it will look like this:
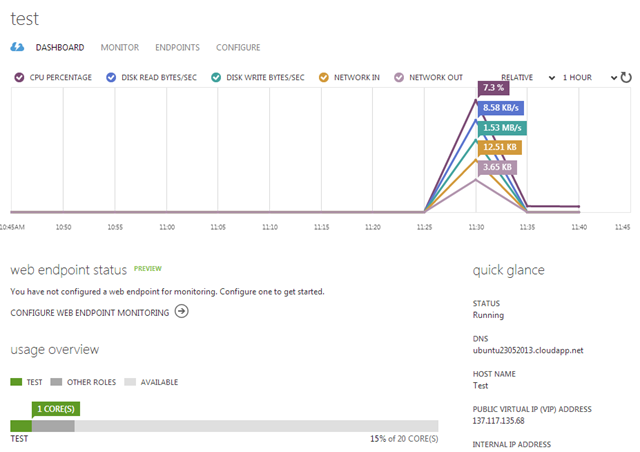
Go to the “Endpoints” tab, and see the public port that has been opened for SSH. SSH is the Remote Desktop Protocol (RDP) equivalent for Linux.

So, the server’s DNS is yourdnsname.cloudapp.net and SSH public port is 54423.
Connect to the VM
Let’s get Putty and configure it to connect to this VM:

Put the DNS and the port. Then put a name on “Saved Sessions” and click Save. Then go to “Appearance” and change the font to Consolas, 15. Come back to this, and click “Save” again.
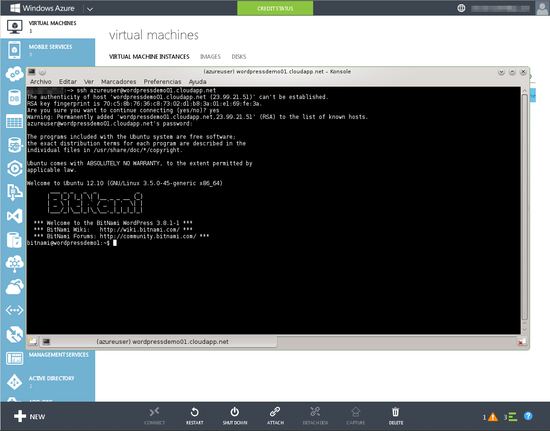
Now click “Open” and you will be taken to the remote session on the server. You will be asked to accept the server, just click Yes. Use your azure account details as login and password.
You will see a screen like below:
The so-called endpoints are the open ports on your machine. In this case, port 22 (SSH) and 80 (HTTP) are both open.
If your server has web interface, you should open an HTTP and HTTPS endpoint when you are ready to go into production. You can do this by clicking VIRTUAL MACHINES in the vertical menu bar on the left, choosing VIRTUAL MACHINE INSTANCES in the central resource area and then clicking on the name of the virtual machine you want to add an endpoint to.
You can now access your virtual machine via the web visiting DNSname.cloudapp.net, where DNSname is the name shown in theDNS NAME column of the VIRTUAL MACHINE INSTANCES tab.
You should receive something like:
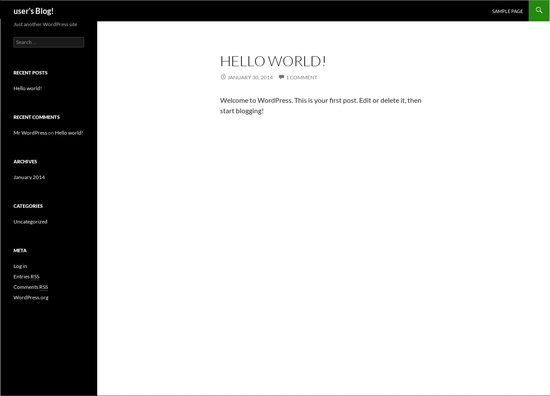
To see the wordpress site itself, visit DNSname.cloudapp.net/wordpress. To log into your WordPress site for the first time, use user as your username and bitnami as your password. You are advised to change these credentials as soon as possible after deploying your site.